
Hanging Out at Horseshoe Bend • Arizona
Where is Horseshoe Bend?
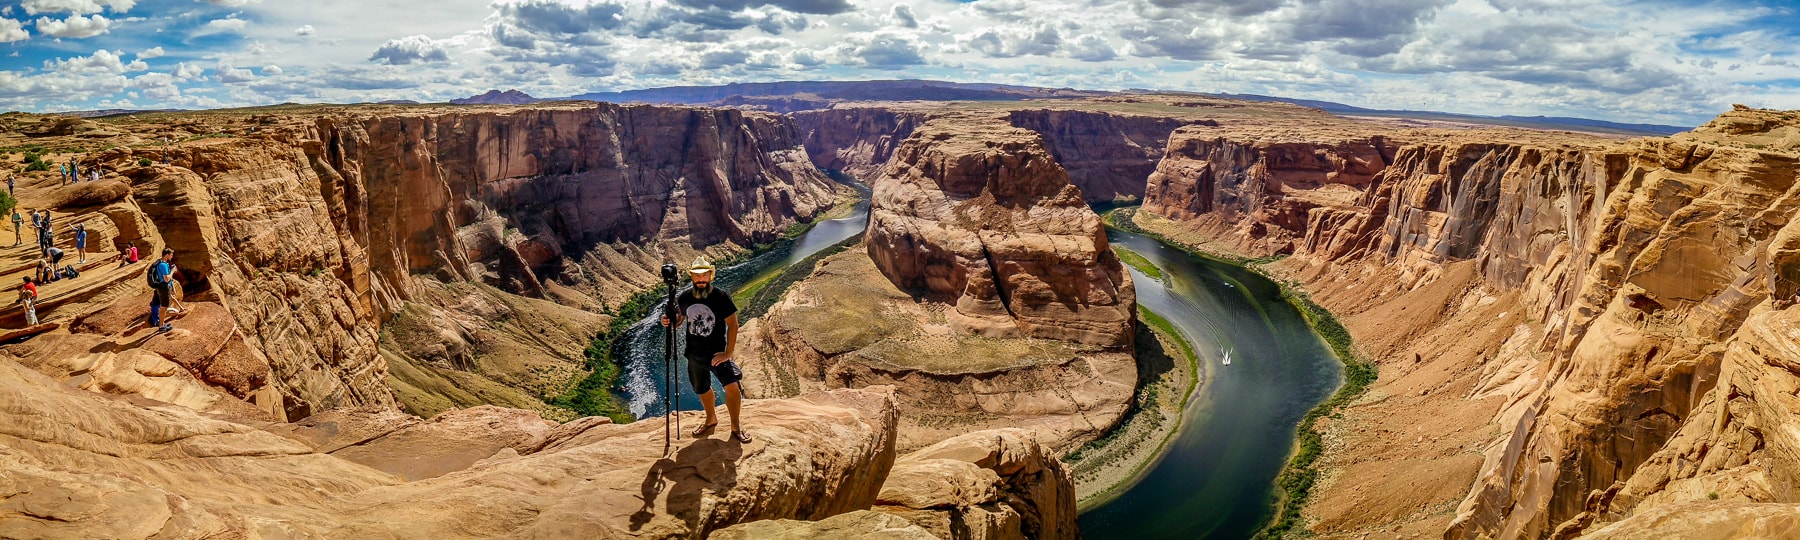
Horseshoe Bend is a famous horseshoe-shaped meander in the Colorado River near Page, Arizona. After driving 10 minutes south from Page, Arizona, you’ll see a dirt road between mileposts 544 & 545 on the west side of Highway 89. There is a small dirt parking lot and the Horseshoe Bend lookout can be accessed by walking a relatively flat 3/4 miles (~1.2kms) each way.

Horseshoe Bend
Why Visit Horseshoe Bend?
Horseshoe Bend should not be considered a tourist destination in itself. It is a beautiful place to stop and take photos but a 30-60 minute stop will be enough for most people. Luckily, Horseshoe Bend is close to Lake Powell, the Glen Canyon Dam, and Upper / Lower Antelope Canyons making it easy to fill a day with activities. Furthermore, Horseshoe Bend is only 2 1/4 hours from the North Rim of the Grand Canyon or Grand Canyon Village (South Rim).

Epic Views at Horseshoe Bend
How High is the Horseshoe Bend Overlook?
The overlook is 1000 feet (300m) above the Colorado River. That’s about the same height as a 90 story building!
There are no ropes or wires and a fall would almost certainly kill you. Be aware of the risks! Parents with children need to keep watch over their children and set firm safety rules in advance. The leading cause of “selfie-related” deaths is falling from heights so don’t get cocky and become a ridiculous statistic.

Feeling Lucky at Horseshoe Bend
If you’re uncomfortable at heights be sure to stay back from the edge. I faced my fear of heights a long time ago so I got closer to the edge than most. I was very cautious at all times and ensured I had a “stumble zone” in case I was caught off-guard by a gust of wind or lost my balance. I’ve heard of tragic falls due to people accidentally being bumped by other tourists so avoid crowded areas. When the area at the bottom of the horseshoe (east end) became too crowded we took a short walk to take photos from other angles.

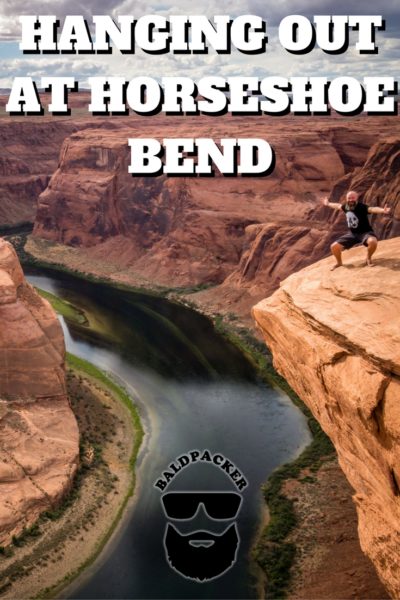
Hanging Out at Horseshoe Bend
It was funny watching people afraid of heights take photos, but I guess it’s better to look ridiculous than die…

How to Safely Take Photos?
My Top 5 Horseshoe Bend Photography Tips
1. Shoot During Sunrise or Sunset
Photographers usually try to shoot during the “golden hour” (AKA “magic hour”) when the sun produces a soft, diffused light. For the uninitiated, this is the first hour after sunrise or last hour before sunset when the sun is low in the sky.
The top of the horseshoe’s “U” faces west and the overlook is to the east. Therefore, at sunset, you’ll be shooting into the sun which presents its own set of problems.
The first problem is the crowds at Horseshoe Bend during sunset. I’d recommend showing up early, setting up a tripod where you want to shoot, and enjoying a snack or picnic while you wait. Depending on your position, the sun may or may not be in your frame. If the sun is not in your frame, you may be able to block lens flare by holding up a clipboard or umbrella in front of your camera to shade your lens. If the sun is in your frame, you’ll probably want to remove lens filters and take lots of photos at different angles to reduce lens flare. In all likelihood, your best photos will be after the sun has dropped below the horizon and direct sunlight is reduced.
Personally, based on images I’ve seen, Horseshoe Bend is most stunning at sunrise when the sun is at your back. Not only is it less crowded but the colours of the valley can be magnificent. Unfortunately, seeing the sunrise at Horseshoe Bend basically requires overnighting in Page, Arizona, but perfect photos take sacrifice!

Trying My Best to Photograph Horseshoe Bend in Harsh Afternoon Light
We visited Horseshoe Bend mid-afternoon, after visiting Antelope Canyon and the Glen Canyon Dam, so I had to deal with harsh sunlight. We had some scattered clouds, which helped, but I still had a hard time fighting the bright highlights and dark shadows. If you’re stuck shooting mid-day, as I was, try bracketing exposures and shooting RAW for post-processing. I also wish I’d brought a CPL filter to reduce glare.
2. Use a Tripod
We’ve all seen photographers assume strange positions trying to acquire the perfect photo but watching photographers on a cliff’s edge can be terrifying. For personal safety, and better image composition, consider using a tripod. It’s better to up your tripod close to the cliff’s edge and maintain a safe distance yourself. If you’re able to shoot at sunrise or sunset, you’ll also appreciate having more control over your aperture / shutter speed thanks to the stability.

Maintain a Safe Distance From the Edge with a Tripod
3. Use a Wide-Angle Lens
I used a 14mm lens on my micro 4/3 mirrorless (28mm equivalent) and wish I had an even wider angle lens with me.
If you have a GoPro, set it to its widest setting and have fun playing with its fisheye effect. If you have a smartphone, figure out its panoramic settings and experiment with different angles and pans. I hate selfie sticks but they can be useful for achieving dangerous-looking photos from a safe distance.

4. Use a Subject
I’ve seen thousands of amazing photos of Horseshoe Bend. Sometimes there’s the perfect storm with colourful clouds or lightning. Other times the river is so calm mirrorlike reflections are possible. It is unlikely you’re going to experience ideal conditions for photography but you can still take memorable photos.
Assuming you’re traveling with someone else, use them as a subject and create a unique composition. Consider bringing props and trying different angles. Use that selfie stick you’re ashamed to own for photos from above or over the edge. Experiment to see if you can create an image that stands out from the thousands of photos taken at Horseshoe Bend.

Sara Looking Out Over Horseshoe Bend

Spanish Cowgirl at Horseshoe Bend

Bald Bearded Backpacker at the Bend
5. Have Fun
Unless you’re a professional photographer with bills to pay, remember to put down your camera and enjoy the experience. Horseshoe Bend is not an easy destination to visit so be sure to soak it all in. Sit. Relax. Snack. Smile. Laugh. You’re lucky to be where you are!

Feeling Lucky!
Hello! Lovely photos!
I was wondering what time of day you took the photos with you and your partner?
Thanks Winnie. To be honest, the lighting was horrible while we were there. I believe it was 2pm or so – about the worst possible time for photography but the best we could do with our itinerary. The clouds helped diffuse the sun a little bit but I still had to underexpose most of the photos and bring out the shadows in post-processing to avoid blowouts.
Great tips. Thanks!